
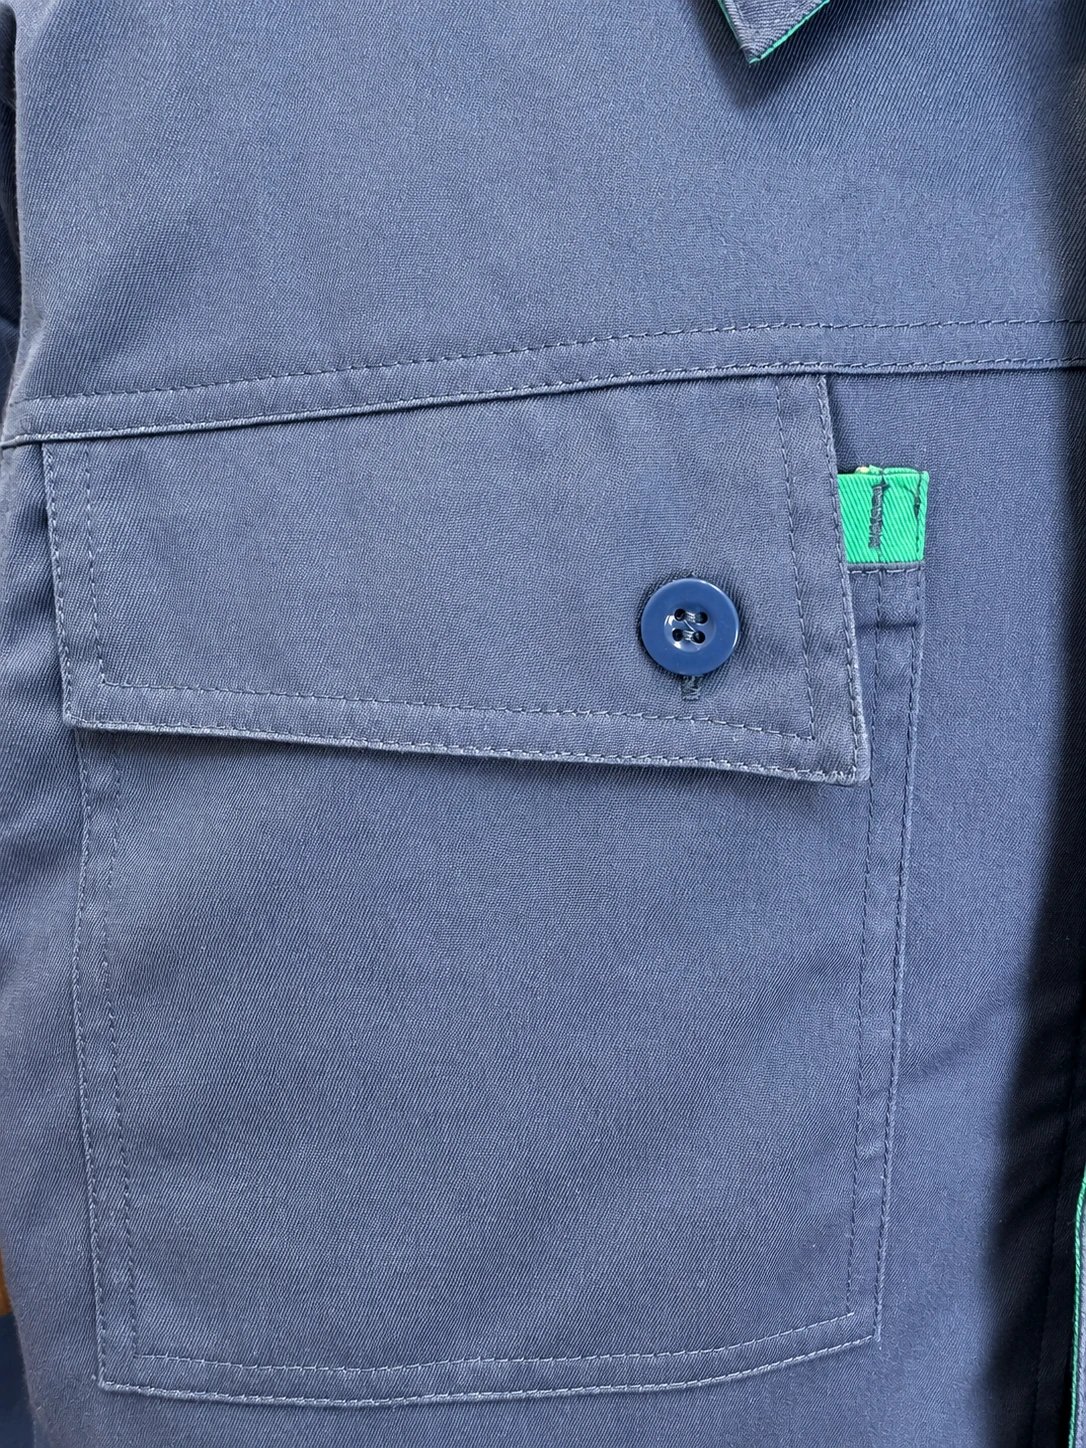
A workwear tech pack is the shared specification used to develop, review and reproduce a garment. It brings together drawings, materials, measurements, construction details, branding, labels, packing instructions and approval records. For a custom jacket, trouser or coverall order, it connects the buyer's requirements to decisions the manufacturer can act on.
You can begin an enquiry with a photograph or a physical sample. Before bulk production, however, the people placing, making and inspecting the order need to know which details are agreed, which references apply and which questions remain unresolved.
This guide explains how to build that record. It includes a specification checklist, material and measurement tables, a worked development example and practical controls for samples, changes and repeat orders. The templates are purchasing tools to adapt with your supplier; they are not a universal factory procedure or an ISO-prescribed document format.
1. What should a workwear tech pack include?
A useful workwear tech pack answers three questions: what garment are we developing, how will we describe and check it, and what has actually been approved? Organise the information so a person receiving the files for the first time can locate those answers without reconstructing an email conversation.
| Section | Information to record | Decision it supports |
|---|---|---|
| Style identity | Style code, garment type, buyer, revision and date | Whether everyone is using the same specification |
| Intended use | Wearers, tasks, layers, care arrangements and stated performance requirements | Whether the proposed design addresses the brief |
| Technical drawings | Front, back, inside and enlarged detail views | Where each feature belongs and how it is arranged |
| Bill of materials | Fabric, lining, reinforcement, thread and trim references | Which components the sample and bulk order use |
| Measurement specification | Points of measure, methods, units, size values and agreed tolerances | How dimensions and size consistency are assessed |
| Construction | Seams, pockets, closures, cuffs, waistband and reinforcement | How the garment details are developed and checked |
| Branding | Artwork versions, colours, dimensions and placement | What appearance the buyer approves |
| Labels and packing | Label artwork, size identification, set pairing and carton instructions | How finished garments are identified and delivered |
| Approval history | Sample identifiers, comments, decisions and outstanding actions | What can proceed to the next stage |
The purchase order can hold quantities and commercial terms separately. Link it to the same style codes and specification revision. An approved garment drawing does not, by itself, establish the quantity, shipment terms or payment arrangements for an order.
A spreadsheet, a document or a dedicated development platform can hold this information. The practical test is whether the manufacturer can use it, the buyer can review it and the current approved version remains identifiable when files are downloaded or printed.
2. Separate the enquiry brief, tech pack and production approval
These records develop together, but they serve different purposes. Treating them as one decision can leave a buyer believing production is approved while the factory is still waiting for a material or measurement confirmation.
An enquiry brief explains the opportunity: garment type, reference style, intended use, approximate quantity, destination and required milestone. It helps a manufacturer identify what must be clarified before a meaningful proposal can be prepared.
The tech pack records the developing specification. Early versions may contain open decisions. A manufacturer might propose a fabric, clarify a pocket arrangement or request a drawing of the logo position. Those discussions belong in the revision process.
Production approval identifies the specific combination of documents, samples and materials that is authorised for the order. A tech pack filename containing the word “final” is not a substitute for that decision.
For example, a jacket sample may use the correct silhouette but a temporary zip. The buyer might approve the shape while requesting the quoted zip for the next review. Record the approval as limited to the agreed features. Otherwise, the temporary component can appear to have inherited approval simply because it was attached to the sample.
For OEM development, the buyer may already have drawings, patterns or an approved reference garment. For ODM development, the starting information may be a task description and reference images. Both routes still need an agreed specification before bulk production. Our OEM and ODM development guide explains how those starting points fit into the wider order process.
3. Define the wearer and working conditions before choosing details
Write a short use brief at the beginning of the pack. Describe the people and activities the garment is intended to accommodate. A label such as “warehouse uniform” leaves open whether the wearer spends most of the shift seated, walking, lifting or moving between indoor and outdoor areas.
Useful questions include:
- What movements should the garment accommodate during a normal shift?
- What items need to be carried, and where must they remain accessible?
- Which base or mid layers are expected underneath?
- Are jackets and trousers issued as fixed sets or selected separately?
- Who washes the clothing, and what care process is intended?
- What appearance requirements apply across roles, sites or customer-facing work?
- Does the garment need a defined protective function requiring separate evidence?
Translate the answers into development questions. If a wearer regularly reaches overhead, the sample review should include that movement with the intended layers. If a handheld device goes into a pocket, bring the actual device or an accurately sized reference to the review.
Describe protective requirements precisely and involve the people responsible for their assessment. “Suitable for an oilfield” is not a complete performance specification. A reference photograph cannot establish flame resistance, static performance or any other protective function.
The tech pack should preserve the requirement and identify the evidence needed for the exact product proposal. It should also record who can approve changes affecting that requirement. This gives design development a defined boundary while leaving the relevant performance assessment to the appropriate process.
4. Establish style codes, document ownership and revision rules
Choose a stable style code before several sample versions begin circulating. Use it on the drawing, material sheet, measurement specification, sample label and comments record. For a jacket-and-trouser set, identify the two garments separately even if the commercial order also has a set code.
A practical document header contains the buyer or brand, style code, garment description, revision, issue date, document owner and current status. Use statuses that describe a decision, such as “for development review” or “approved for the identified production order.” Avoid treating every issued file as approved.
Number the pages or identify the component sheets so a missing measurement page is visible. Where files are stored separately, maintain an index showing which revision of each file belongs to the current package. The drawing and artwork may not change at the same time, but their approved relationship should remain clear.
Keep a short revision log. State what changed and why, rather than recording only that a new PDF was issued. A revision affecting the pocket opening deserves more explanation than a spelling correction in the garment description.
ISO 10007:2017 provides general guidance on configuration management across the life of products and services. It is a relevant background reference for keeping an identified product configuration under control; it does not prescribe this garment document layout or certify a supplier's workflow. Source: ISO 10007:2017
The file rules above are practical recommendations for a workwear project. Agree the actual document owner and approval method with the parties involved.
5. Use technical drawings to remove visual ambiguity
Photographs are useful references for appearance. Technical drawings help explain the details a photograph leaves uncertain: pocket position, panel boundaries, openings, closures and the relationship between components.
Include front and back views. Add inside views where a lining, internal pocket or closure arrangement needs explanation. Enlarged detail drawings are useful for a cuff tab, concealed fastening or reinforcement area that would otherwise be too small to read.
Give each important detail a callout code. A pocket can then be referenced consistently on the drawing, construction sheet and comments record. This is especially useful when a garment contains several similar pockets and the buyer requests a change to only one of them.
Define the orientation of the drawing. “Left chest” should mean the wearer's left chest, or another clearly stated convention. Without that agreement, a correctly reproduced measurement can still be placed on the wrong side.
If a reference garment has a chest pocket that should remain and a sleeve pocket that should be removed, mark both decisions. Do not expect the sample maker to infer a deletion from the absence of a comment.
Where a detail is undecided, show the question next to the relevant callout and ask for a proposal. Once the proposal is accepted, replace the open note with the agreed specification. Keeping the old question beside a new drawing makes it harder to determine whether the feature is still under discussion.
For help turning task requirements into drawings, see our uniform design brief guide.
6. Build a bill of materials around identifiable components
A bill of materials, or BOM, lists the materials and components intended for the garment. Each row should be specific enough to distinguish the proposed item from an alternative that looks similar.
“Navy polycotton” is an incomplete material reference. Record the proposed composition, fabric weight, construction, finish, colour reference and supplier or material code. Where a field has not been agreed, identify the decision that remains open.
| Component | Specification fields | Reference to retain |
|---|---|---|
| Main fabric | Material code, composition, weight, construction, finish and colour | Identified swatch and approval record |
| Contrast fabric | Material code, location and colour | Swatch linked to drawing callouts |
| Lining | Material code, composition, weight and coverage | Sample or agreed material reference |
| Reinforcement | Material identity, shape, coverage and placement | Drawing and physical sample |
| Zip | Type, size, length, colour, puller and specified source | Component code or retained sample |
| Buttons or snaps | Type, dimensions, finish, arrangement and attachment details | Component reference and sample review |
| Elastic or adjustment tape | Material, dimensions, location and intended adjustment | Component reference and construction detail |
| Thread | Agreed type, size or supplier reference and colour by operation | Supplier proposal and approved application |
| Labels and branding | Material, artwork version, dimensions and application | Approved artwork and physical review |
Keep material identity separate from performance evidence. A description may identify a fabric, while a report addresses a particular property under stated conditions. Link each report to the material or product it actually covers.
If the supplier offers an alternative, give it a separate row or option code. This allows the buyer to compare the substitution without overwriting the original proposal. A material change may affect appearance, care, construction, cost or the checks needed before approval.
Record temporary components used in development samples. The BOM should make it possible to see both what was physically reviewed and what remains proposed for bulk production.
7. Approve fabric and colour as separate decisions
A fabric can have the requested colour but the wrong construction. It can also match the requested composition and weight while looking different from the buyer's approved colour reference. Keep those decisions visible rather than combining them into one “fabric approved” message.
For material identity, record what was proposed, what sample was reviewed and whether any finish or backing is included. If two options are being compared, use the same set of fields and keep their references distinct.
For colour, identify the physical master or agreed colour reference, the material to which it applies and the comparison arrangement. A screen image may help discuss placement, but it does not create a controlled physical shade reference.
When a jacket combines navy and red panels, approve the two materials individually and review their appearance together. The main fabric, contrast fabric, thread and logo may each need their own reference. “Match the jacket” is difficult to apply if the jacket itself is still under review.
For later production batches, keep the approved reference and the actual batch identity together. If the buyer needs close visual consistency between jackets and trousers supplied at different times, raise that expectation before committing to the supply arrangement.
Do not publish an arbitrary colour-difference limit as though it applies to every order. If an instrumental comparison will be used, agree the method, conditions and decision rule with the relevant parties. If visual approval is used, document the comparison reference and approver.
A useful colour record explains what was accepted, against which reference and for which material. It also identifies whether another review is required when the material source or production batch changes.
8. Distinguish body measurements, garment measurements and ease
A size label such as “L” is a purchasing reference, not a complete description of fit. To reproduce a garment, the manufacturer needs finished-garment measurements and the method used to obtain them.
Body measurements describe the wearer. Garment measurements describe the clothing. Ease is the room incorporated into the garment for fit, movement and intended layering. These are related, but they should not be entered in the same column without explanation.
ISO 8559-1:2017 provides definitions for body measurements used in clothing size development. Its published scope concerns anthropometric measurement; it does not provide your order's finished-garment dimensions or a universal tolerance for every garment. Source: ISO 8559-1:2017
For example, a body chest circumference and a jacket measured flat across the chest use different references. A trouser waistband measurement also needs a defined condition: fastened or unfastened, relaxed or extended, and measured at which edge or position.
Create a points-of-measure sheet, often called a POM sheet. Give each measurement a code, name, diagram, method, units and values by size. State how the garment is laid out and which parts are included or excluded.
| POM code | Garment measurement | Method information to define |
|---|---|---|
| J01 | Jacket chest width | Position of the measurement line and flat-measurement endpoints |
| J02 | Jacket back length | Upper reference point, lower endpoint and treatment of the collar |
| J03 | Sleeve length | Starting point, route and whether the cuff is included |
| T01 | Trouser waist | Fastening position and relaxed or extended condition |
| T02 | Trouser inseam | Crotch reference, measurement route and hem endpoint |
| T03 | Thigh width | Distance from the agreed crotch reference and measurement direction |
A diagram should resolve interpretation, not merely decorate the sheet. If two people measure the same sample differently, review the method before concluding that the garment has changed.
9. Set tolerances and grading rules for the actual project
A tolerance describes the permitted difference from a specified value under the agreed measurement method. It needs to be connected to a measurement point and a decision rule. “Standard factory tolerance” leaves the buyer and inspector uncertain about what has been accepted.
Agree tolerances by point where appropriate. The considerations for a small pocket opening may differ from those for the overall length of a large outer garment. Do not assume a tolerance suitable for one measurement should be copied across the whole sheet.
Keep pattern dimensions separate from finished-garment acceptance measurements. A dimension used during pattern development may include allowances or construction considerations that are not visible in the same way on a finished sample.
Grading rules define how the garment changes across sizes. A base-size approval does not demonstrate that every other size has the intended proportions. Review the proposed size range and agree which sizes need physical evaluation for the project.
Where a buyer supplies an existing size chart, establish whether it contains body dimensions or garment dimensions. Confirm whether it is a target specification, a record of an earlier sample or a chart used only for wearer selection.
For elasticated areas, separate the relaxed dimension from the adjustment or extension requirement. For garments worn over layers, test the relevant sample combination rather than adding an unexplained allowance to every measurement.
The resulting record should identify the values, methods, tolerances and size coverage that have actually been approved. Our size-set approval guide explains how to connect those decisions to a sample review.
10. Write construction details that can be reviewed on a sample
Construction notes should explain how a feature is arranged and what the buyer needs to assess. Broad phrases such as “strong stitching” or “heavy-duty pockets” do not establish a reproducible specification.
For each pocket, identify its callout, finished dimensions, position, opening, closure, internal divisions and reinforcement locations. If the pocket carries a particular item, record the intended item and arrange a practical access check on the sample.
A pocket can have the correct overall dimensions while its opening is too restricted for the intended use. It can also be positioned correctly on a standing wearer but become uncomfortable when seated. These observations belong in the development record alongside the measurements.
For seams, identify the construction proposal and where it applies. Ask the supplier to clarify an unfamiliar seam description with a drawing or sample. If the order requires a specific stitch arrangement, finish or reinforcement, record it against the relevant location.
Closures need similar attention. Identify the fastening type, opening direction, coverage, puller and any guard or flap. Review whether the closure interferes with the pocket, lining or adjustment feature around it.
For reinforcement panels, show coverage and shape on the drawing. Review the proposed panel on a garment so the buyer can assess stiffness, movement and appearance in context. A material swatch alone cannot show how the assembled detail behaves during wear.
Where the supplier is developing a solution, retain the original requirement, the proposed construction and the approval decision. This allows later inspection to refer to the accepted detail instead of reopening the design question at shipment time.
11. Plan the care evaluation before writing the care label
The intended care process influences what needs to be assessed during development. Identify whether the wearer washes the garment at home, a company arranges laundering or another service handles the clothing.
Record the relevant care proposal for the complete garment, including its decoration and components. A fabric may be reviewed under one process while the logo, elastic or fastening has not yet been assessed under the same conditions.
ISO 5077:2007 describes a method for determining dimensional change after specified washing and drying procedures. It provides a relevant test-method reference; it does not establish a universal acceptable shrinkage value for your order. Source: ISO 5077:2007
For a development comparison, agree the procedure, number of cycles, measurement timing, sample identity and acceptance criteria with the responsible parties. Keep the before-and-after records linked to the same garment and measurement method.
A practical evaluation record can cover:
| Item | What to record |
|---|---|
| Sample identity | Style, size, material references and sample revision |
| Care process | Agreed washing, drying and other relevant treatment details |
| Measurements | Selected POM results before and after the agreed treatment |
| Appearance | Observations on colour, seams, surface and overall shape |
| Components | Closure operation, elastic condition and label legibility |
| Branding | Appearance and attachment of the actual application |
| Decision | Acceptance, further review or changes needed |
Keep ordinary appearance observations separate from any claim requiring a defined performance test. A sample looking satisfactory after a care trial does not, by itself, verify every protective property.
Once a care instruction is proposed, identify the evidence supporting it and who approves the wording. This makes the care label the output of an agreed review rather than a generic instruction copied from another style.
12. Specify logos, labels and packing without mixing their purposes
Branding, regulatory labelling and logistics identification all appear on or around the garment, but they answer different questions. Give each its own reference and approval record.
Logo artwork and placement
For each application, record the authorised artwork version, method, physical size, colour and location. A dimensioned placement drawing should measure from named garment reference points. “Small logo on the chest” leaves both size and position open.
Review fine lettering, outlines and small details on the proposed base fabric. Ask the supplier to identify any changes needed to reproduce the artwork using the selected method. Record accepted changes in the artwork file as well as the sample comments.
Check the application on the assembled garment. A logo can be visually balanced on a flat panel but conflict with a pocket, closure or different garment size. Our branding approval guide provides a dedicated review checklist.
Care and destination labels
Record the label text, symbols, language, dimensions, material and attachment location. Separate the proposed content from the decision that it is suitable for the product and destination.
ISO 3758:2023 describes its textile care-symbol system and excludes industrial laundering from its stated scope. An industrial-laundry project therefore needs its relevant care requirements and evidence reviewed separately. Source: ISO 3758:2023
For the United States, FTC guidance describes fibre content, country of origin and responsible-business identification for covered textile products. This is a destination-specific reference; check the product's coverage and the applicable requirements before finalising its label. Source: FTC textile labelling guide
Individual and carton packing
Define how pieces are folded, identified and paired. If jackets and trousers are packed as sets, specify whether mixed-size sets are permitted. If pieces are ordered separately, ensure the packing instructions do not automatically pair them.
The carton record should describe the assortment, quantities and shipping marks required by the order. Check consistency between the garment size label, bag sticker, carton marking and packing list. A correctly made garment can still create a receiving problem if these identifiers disagree.
13. Use a sample approval plan with defined decisions
Before asking for a sample, state what it is intended to resolve. A prototype used to discuss pocket layout may not contain the proposed bulk fabric. A fit sample may need the relevant material behaviour before its measurements can be assessed meaningfully.
Agree the sample stages needed for the project rather than assuming every order requires an identical sequence. Several decisions may be combined in one sample when the information is ready. Unresolved decisions should remain visible if they cannot be combined.
| Review stage | Main question | Record to keep |
|---|---|---|
| Design development | Does the shape and feature arrangement address the brief? | Annotated drawing and consolidated comments |
| Material review | Are the proposed fabric and components accepted? | Identified swatches, component references and evidence |
| Fit review | Do the measurements and wearer observations support the intended fit? | POM results and task-based observations |
| Size-set review | Do the selected sizes follow the agreed development rules? | Size-specific measurements and comments |
| Production-reference review | Are the materials, construction, branding and documents aligned? | Identified reference sample and approved revision |
Label each physical sample and photograph the label with the garment. If several versions are on the buyer's desk, a comment about “the latest jacket” is not sufficiently precise.
Use one consolidated comments sheet. For each issue, identify the feature, observation, requested action, owner and decision. Where a change affects another feature, ask the manufacturer to explain the dependency before treating the change as isolated.
Retain the approved reference and its approval scope. A sample approved for fit with temporary labels should not be described later as a fully approved production reference. Our sample approval guide explains how development decisions relate to the bulk order.
14. A worked example: developing a jacket-and-trouser set
The following fictional example shows how to use the template. Its style codes, dimensions and decisions are illustrative. It is not a Workwear Solutions customer case, product specification or recommendation for a particular workforce.
Step 1: Record the initial brief
A distributor wants a two-piece uniform for a warehouse team. The initial reference shows a navy jacket with red contrast panels and matching trousers. The distributor wants clearer size records, a chest pocket for a handheld device and a logo application that can be reviewed before ordering.
The buyer supplies reference photographs, describes the tasks and identifies the destination. Fabric selection and the final quantity breakdown remain open. The development record identifies the jacket as DEMO-J01 and the trousers as DEMO-T01, both at revision A for discussion.
No production release is implied. The first task is to turn the visible design and practical requirements into a proposal the buyer can evaluate.
Step 2: Create the first specification package
The drawing assigns J-P01 to the jacket chest pocket and T-P01 to a trouser cargo pocket. The BOM gives the navy main fabric and red contrast fabric separate material references. The buyer's logo file is recorded by version, and the proposed application remains subject to sample review.
The measurement sheet identifies the jacket chest width as J01. It includes a diagram for the measurement line, rather than relying on the word “chest.” The trousers have a separate sheet with their own waist and inseam methods.
The development team also records what is missing: the final fabric proposal, agreed tolerances, size-range values and the order breakdown. These fields are tracked as decisions, not left as unexplained blank cells.
Step 3: Turn an observation into an actionable comment
During the first review, the buyer finds the device difficult to insert into the chest pocket. Instead of writing “pocket too small,” the comments sheet identifies the feature and the requested change.
| Field | Illustrative entry |
|---|---|
| Sample | DEMO-J01, development sample A |
| Feature | J-P01 chest pocket opening |
| Observation | Device catches at the opening during the agreed access check |
| Measured opening | 13.0 cm using the recorded method |
| Requested target | 14.5 cm, subject to feasibility review |
| Supplier action | Review flap coverage, placement and nearby logo clearance |
| Approval status | Revision required; changed detail not yet approved |
The dimensions above are invented for this example. They are not a pocket-sizing standard or a suggested tolerance.
The manufacturer proposes an adjusted flap and opening. The drawing, pocket specification and comments record are updated together. The next sample is reviewed against that revision so the buyer can assess the combined result.
Step 4: Reconcile the production reference
Before release, the team checks that the approved material references appear in the BOM, the measurement sheet matches the revised sample and the logo application has its own approval. The size breakdown and packing instructions are linked to the correct jacket and trouser codes.
If any item is still provisional, the record identifies the action required and whether it prevents production from starting. The result is a defined approval package, rather than several messages that use the word “approved” for different parts of the garment.
15. Manage specification changes after sample approval
A change after approval needs a visible decision trail. This applies whether the request comes from the buyer, the manufacturer or a component supplier.
Begin by identifying the approved requirement and the proposed change. Explain the reason, affected styles and sizes, and any known effect on appearance, fit, construction, care or performance evidence. Ask the relevant parties to assess price and timing implications before agreeing to proceed.
For example, replacing a zip may affect its opening, puller, appearance or interaction with a guard. A change described simply as “equivalent quality” does not show which features were compared or what the buyer accepted.
Use a change record with the following fields:
- Change identifier and request date.
- Current approved specification and affected component or drawing callout.
- Proposed replacement or revised requirement.
- Reason for the change and its intended scope.
- Checks or samples needed before acceptance.
- Commercial and scheduling consequences to confirm.
- Authorised decision and effective document revision.
Record how the accepted change reaches purchasing, cutting, sewing, finishing and inspection as applicable to the project. Also determine what happens to any work already completed under the earlier revision.
A small visual change can require several documents to be updated. Moving a pocket may affect its placement drawing, the logo position and the measurement check. Reviewing those dependencies is more useful than assigning a change a label such as “minor” before its consequences are understood.
Retain the earlier revision for traceability, while making the current instruction unambiguous. The objective is to preserve the decision history without leaving two competing production instructions in circulation.
16. Connect the approved pack to bulk inspection and shipment release
The approved tech pack provides references for inspection, but it does not contain every element of an inspection plan. Agree the lot definition, inspection scope, sampling arrangements, defect classifications and release responsibility separately where needed.
An inspector should be able to locate the approved measurement sheet, construction details, component references, label artwork and packing instructions. If the pack refers to a physical master sample, identify which sample it is and how access will be arranged.
Separate different kinds of findings. A measurement result outside an agreed tolerance, an incorrect label and a missing component need records that show the relevant requirement. “Quality not good” does not explain the discrepancy or the correction needed.
A practical finding record identifies the order or lot, affected style and size, observation, supporting photograph or measurement, agreed criterion and decision owner. If corrective work is required, record how it will be checked before release.
Do not assume sample approval means every garment in the shipment has been inspected. Equally, do not treat a general workmanship inspection as proof of a protective property that requires separate testing or assessment.
Where a sampling standard is proposed, confirm the actual method and applicable edition before agreeing the plan. Avoid inserting a familiar AQL value into a document without resolving the lot, inspection level and other relevant choices with the responsible parties.
Our pre-shipment inspection guide explains the scope to agree. Use it alongside the garment specification so inspection addresses both what was ordered and how conformity will be assessed.
17. Keep order quantities and delivery milestones consistent with the pack
A detailed garment specification can still be paired with an ambiguous order. Check the commercial records against the style codes, colours, sizes and approved options before manufacturing is released.
The total quantity does not explain the production mix. Identify quantities per garment, colour and size. If the order includes sets, show how the jacket and trouser quantities relate, including any separately ordered pieces.
State whether alternative fabrics or branding options are still being priced. A quotation for option A and an approval sample for option B should not be treated as an agreed combination without confirmation.
Separate delivery milestones. The buyer may need a sample received by one date, production completed by another and goods arriving at destination later. Identify which date is being discussed and what decisions must occur before that milestone can be planned.
A change in quantity, colour mix or component availability may require the supplier to review the proposal. Ask for confirmation of the actual consequences rather than applying a generic rule that every change adds the same number of days or the same cost.
Use the tech pack to identify the product; use the quotation and purchase order to identify the commercial agreement. Where the two documents depend on each other, link their versions. Our quotation comparison guide provides a worksheet for making those comparisons explicit.
18. Prepare repeat orders as a controlled review
A repeat order begins with an earlier reference, but the earlier order does not resolve every new decision. Review whether the garment, material supply, workforce needs or order composition has changed.
Retrieve the approved package and physical references from the earlier order. Confirm that the style code still refers to the same garment. Then ask the supplier to identify any proposed changes in fabric, colour source, components, artwork or construction.
Record the earlier sample and material references alongside the new order. If visual consistency with garments already in service matters, provide a suitable reference and discuss the comparison. An old worn garment may help illustrate the issue, but it should not silently replace the original shade master.
Check the size mix and any new wearer requirements. A repeat customer may need additional sizes, a different trouser length or room for another layer. Those requests belong in the specification and should not be hidden in the order notes.
Review labels and packing as well. A distributor's barcode system, customer address or carton assortment may have changed even when the garment design has not.
Where a material or component is no longer available, request a defined alternative and agree the checks needed. Do not automatically carry forward the old approval to a substitute.
The repeat-order record should finish with a clear decision: the earlier approved configuration remains applicable, or a new revision has been approved for the identified changes. That distinction makes the next order easier to review and provides a usable starting point for future development.
19. Common tech pack problems and how to correct them
Most document problems become visible when someone tries to act on the information. Use the table below to review a pack before sending it for development or production confirmation.
| Problem | Why it creates uncertainty | Practical correction |
|---|---|---|
| A photograph is the only specification | Hidden construction, materials and dimensions remain undefined | Add drawings, component references and measurement methods |
| Different files use the same revision name | The current package is difficult to identify | Use a package index and meaningful revision log |
| The size chart mixes body and garment values | The same heading can describe different measurements | Separate the charts and label their purpose |
| A sample includes unrecorded substitutes | The buyer may appear to approve components never intended for bulk | Identify substitutions and limit the approval scope |
| Changes are spread across separate messages | The manufacturer must reconstruct the decision | Issue consolidated comments and update the specification |
| Care wording is copied from another style | The complete garment has not been reviewed against that proposal | Confirm the intended process and relevant evidence |
| Labels and cartons use different size names | Receiving staff cannot reconcile garments with the packing list | Review the identification system across all records |
| “Approved” has no named object | It is unclear whether fit, fabric or the complete garment is accepted | Identify the sample, revision, scope and approver |
Treat each issue as a question to resolve, rather than as a reason to delay the first conversation. A manufacturer can work with an incomplete brief when the gaps are visible. Problems arise when provisional information looks final and the next person has no reason to question it.
20. Questions buyers ask about workwear tech packs
Can I request a quotation before the tech pack is complete?
Yes. Send the information available and identify the unresolved details. Ask the supplier to state the assumptions used in the quotation. If fabric, branding or construction changes later, review the quote against the revised proposal before treating the earlier price as applicable.
Can an existing sample replace a written specification?
A sample is a useful physical reference, particularly for appearance and construction. A written record is still useful for dimensions, size coverage, material identity, approved changes and the order's other requirements. Link the sample to the document revision so they form one identifiable reference package.
Who should create the tech pack?
The buyer, an appointed designer or the manufacturer may prepare different parts, depending on the development arrangement. Agree ownership and review responsibilities early. The person assembling the files does not automatically have authority to approve every material, commercial or performance decision contained in them.
Does every style need the same amount of detail?
No. Include enough information to define the garment and the decisions it requires. A familiar style with established components may need fewer development discussions than a new style with unresolved materials and construction. Shared references can reduce duplication, provided their identity and revision remain clear.
Does a tech pack prove that a garment is certified?
No. A tech pack describes the intended product and its approval records. A certification or performance claim needs the relevant evidence for the product and scope concerned. List required documents separately and check that they correspond to the proposed material or finished garment.
What if a supplier cannot reproduce a specified detail?
Ask for a written explanation and a defined alternative. Review its effect on the garment, any related checks, price and timing. If accepted, update the specification and approval record before proceeding. An alternative should not become the production instruction solely because it appeared in a sample.
21. What to send when you do not have a complete tech pack
You do not need to resolve every field before contacting a manufacturer. Begin with a clear starting point: the garment reference, intended use, approximate quantity, destination and the decisions you want help developing.
For a first discussion, prepare:
- Photographs, a drawing, a physical sample or a catalogue reference.
- A short explanation of the wearers, tasks and expected layers.
- Quantities by style and colour, with the available size breakdown.
- Known fabric, construction, branding and care requirements.
- Destination and the required delivery milestone.
- A list of fixed requirements and open development questions.
Workwear Solutions supports made-to-order OEM and ODM workwear projects. Share the documents you already have and identify which parts need development. Material proposals, sampling arrangements, minimum quantities, pricing and production timing are reviewed against the project requirements.
Use our custom workwear enquiry checklist to organise the first message. As the project develops, bring each accepted decision into the same specification package so the eventual production approval refers to a garment everyone can identify.
Sources and further reading
The linked official pages support the specific scope statements used in this guide. The document fields, tables, fictional example and workflow recommendations are editorial purchasing tools. They do not reproduce a standard's required form or establish product certification.
- ISO. ISO 8559-1:2017 — Size designation of clothes: Anthropometric definitions for body measurement.
- ISO. ISO 5077:2007 — Textiles: Determination of dimensional change in washing and drying.
- ISO. ISO 3758:2023 — Textiles: Care labelling code using symbols.
- ISO. ISO 10007:2017 — Quality management: Guidelines for configuration management.
- US Federal Trade Commission. Threading Your Way Through the Labeling Requirements Under the Textile and Wool Acts.